DIY Wall Pocket
Learn how to create a DIY wall pocket to hang on your wall! You can easily create this from scrap materials to keep track of keys, mail and more.
I know I’m not the only one who can tend to gather…er…hoard things. haha. In this instance, though, I entirely blame my husband. When I send him to the home improvement store, there is strict instruction to not come home with another paint stir stick with a purchase. However, you can see how serious my instructions are upheld. Well, today I’m making use of my stash to show you how to create a DIY wall pocket, particularly for the upcoming holidays.
Step 1:
To begin creating this wall pocket, first you need to have a few basic tools & supplies:
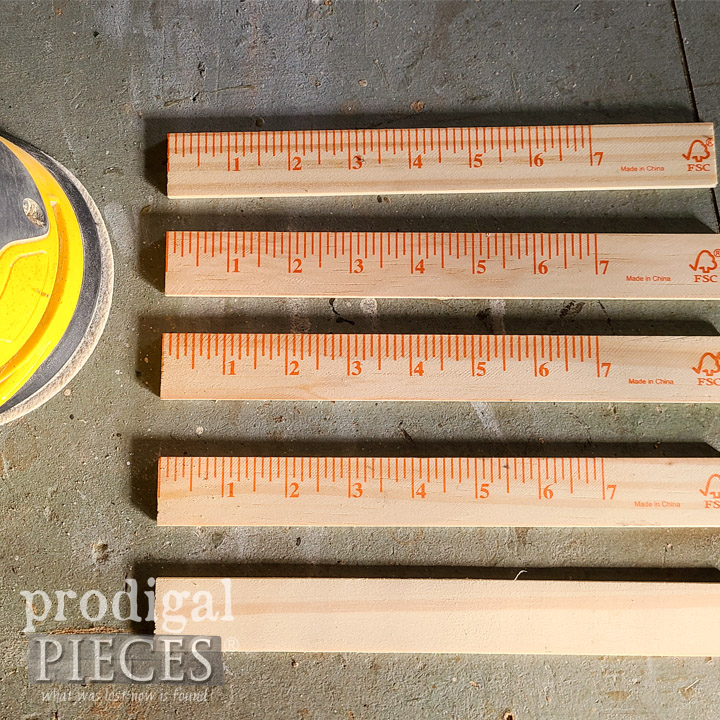
- 10 paint stir sticks: 5 - 9" slats, 2 – 8 ½” slats, 2 – 8 ¼” slats, 1 – 7” slat
- scrap wood - I'm using 3 - 1" x 4" pine cut into 6 ¾” lengths
- wood glue
- saw - miter saw, miter box, coping saw, hacksaw...whatever you want
- jig saw
- stapler and/or nailer
- Quick Finish Paint Sprayer
- Spray Shelter
- Turn Table
- Sawtooth hanger
- Eye hook
- paint (optional)
- stain (optional)
- linen and twine for stockings (optional)
- fabric transfer paper (optional)
To get started, decide what size you want your wall pocket to be. My goal was to use as much as possible of a single stir stick without waste. First, I cut 5 sticks into 9” lengths. Then, sand the sticks down to bare wood. Or, you could leave the ruler part to add a bit of whimsy. Have fun with it!
Step 2:
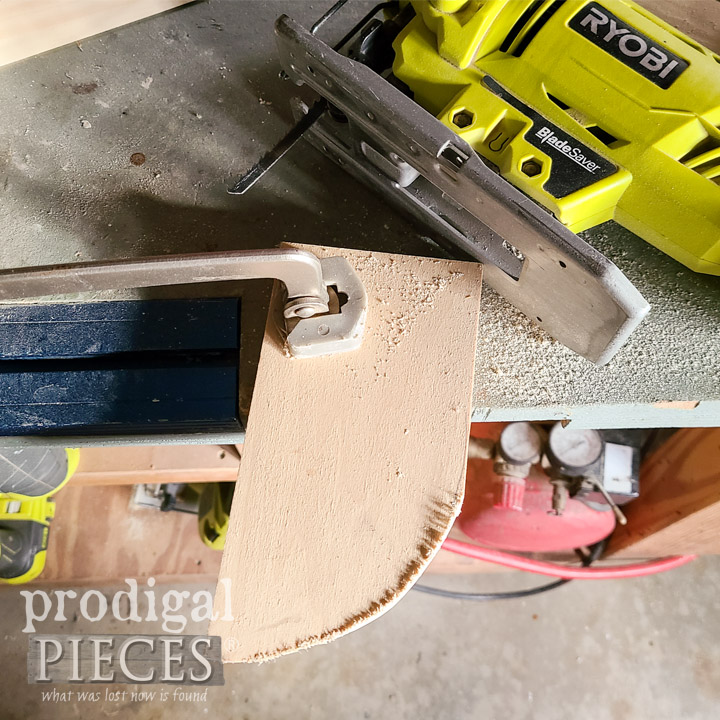
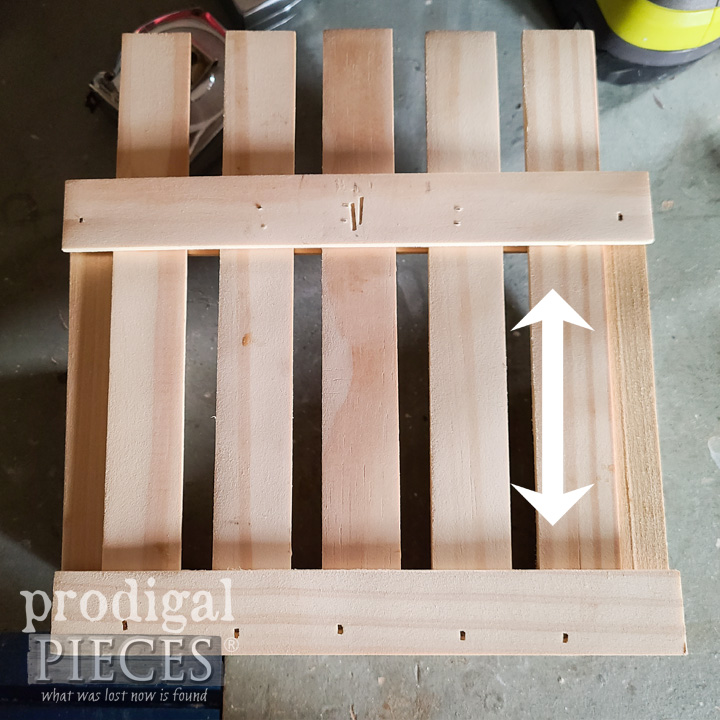
Next, it’s time to cut our side and bottom pieces. They are already sized to length, but if want to create a slight curve for style, now’s the time to add it. Use a jig saw or coping saw to cut the wood. Also, you need to cut a bottom piece that fits between the two uprights. Attach with wood glue and a nailer or pre-drill and add screws from outside into the bottom piece. The back slats are not attached yet - see next step.
Step 3:
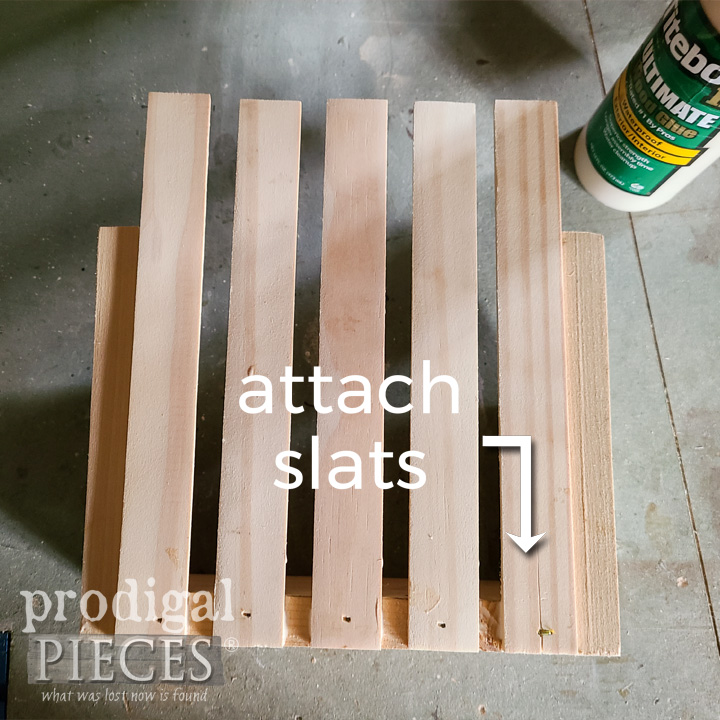
It’s now time to attach our back slats. First, I use my nailer and wood glue to attach slats to the bottom edge piece. You can also use a basic heavy-duty hand-held stapler with ½" staple too.
Step 4:
With those back slats sort of loosely attached, you are adding two supportive 8 ½” slats to the back at the top and bottom edge. Also, you will use wood glue and nails to the bottom edge, and only to the outer edge of the top slat. (see photo below for reference)
Step 5:
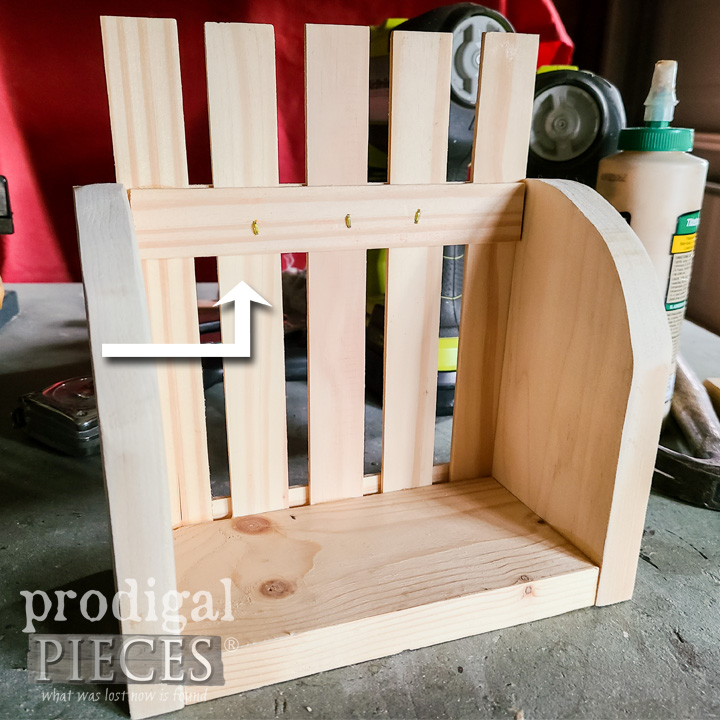
Next, we flip the wall pocket over and add another 7” slat directly in front of the top back slat you just attached. You can see I used wood glues and staples.
Step 6:
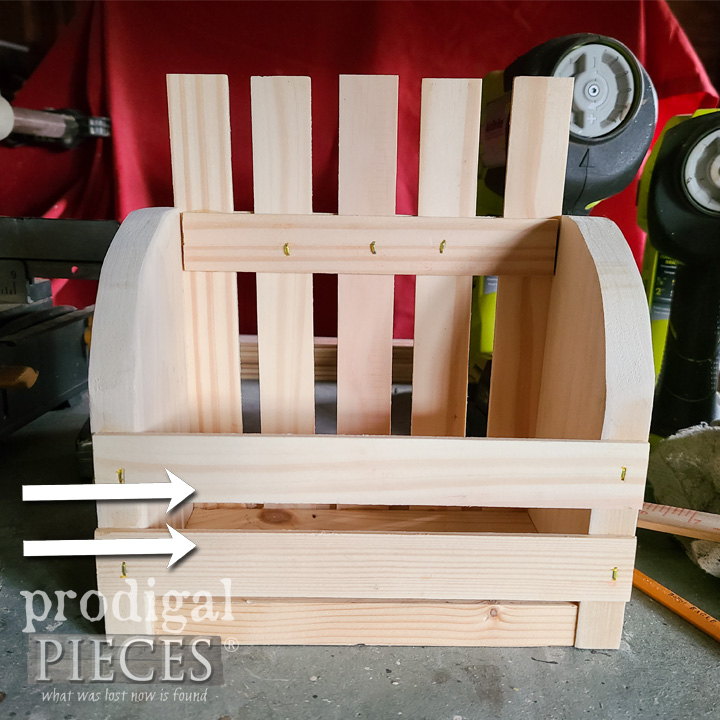
Last, take your last two 8 ¼” slats and attach them to the front. Feel free to place them in whatever spacing you see fit
Step 7:
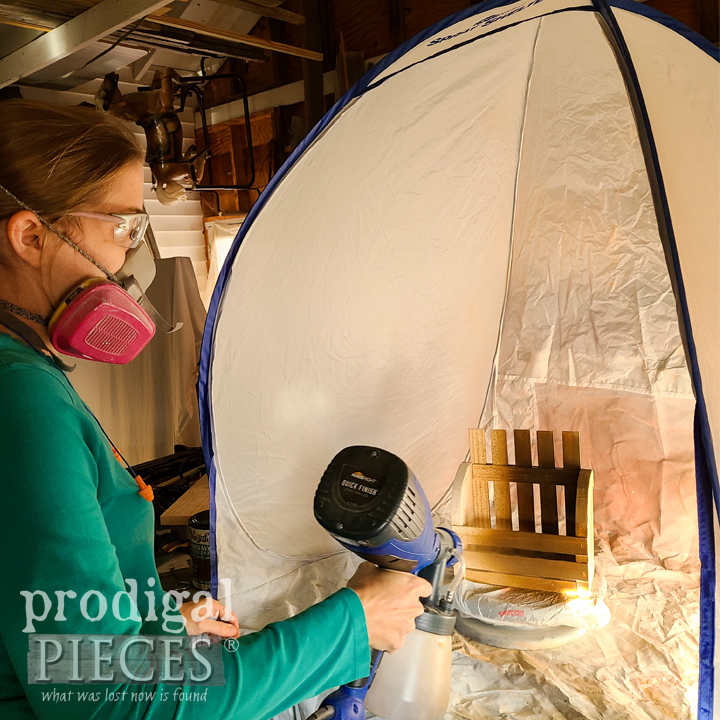
At this point, you can finish your wall pocket in any look you like. You can use paint only, paint/stain, or leave it raw. For my wall pocket, I wanted a rustic, time-worn look. To accomplish that, I choose an aged wood reactive stain. This stuff is awesome! No stinky chemicals, no wiping off yucky, and it's done in flash. To make it better, I whip out my handy (and fun!) HomeRight Quick Finish Sprayer. Also, I use my Small Spray Shelter and Turn Table.
Without a doubt, I can honestly say that this is the easiest sprayer to use. I love my Super Finish Max Extra Sprayer for my big jobs, but this one is perfect for smaller crafty situations.
When I load up the canister and begin to spray, I literally let out a "Yippee!!" I had that wall pocket stained within seconds. Can you imagine how long it would take to stain each side of every slat and corner by hand? Even the mess it would be otherwise is incomparable. You would think the fun would wear off for me, however, I'm still enthralled how easy it is to use and how fast it works!! You can see it in action in my video HERE.
Step 8:
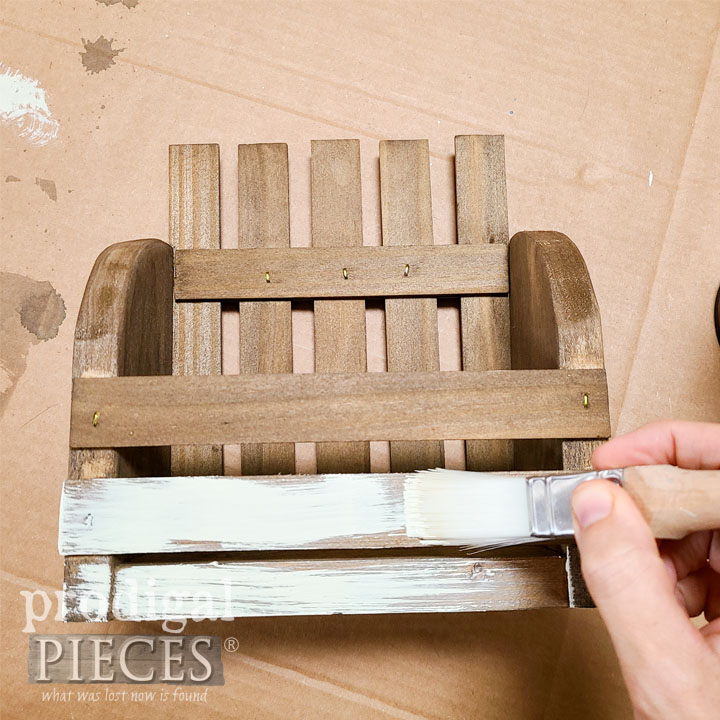
Once the stain cures, you can use a soft white and a dry brush to whitewash your wall pocket.
Step 9:
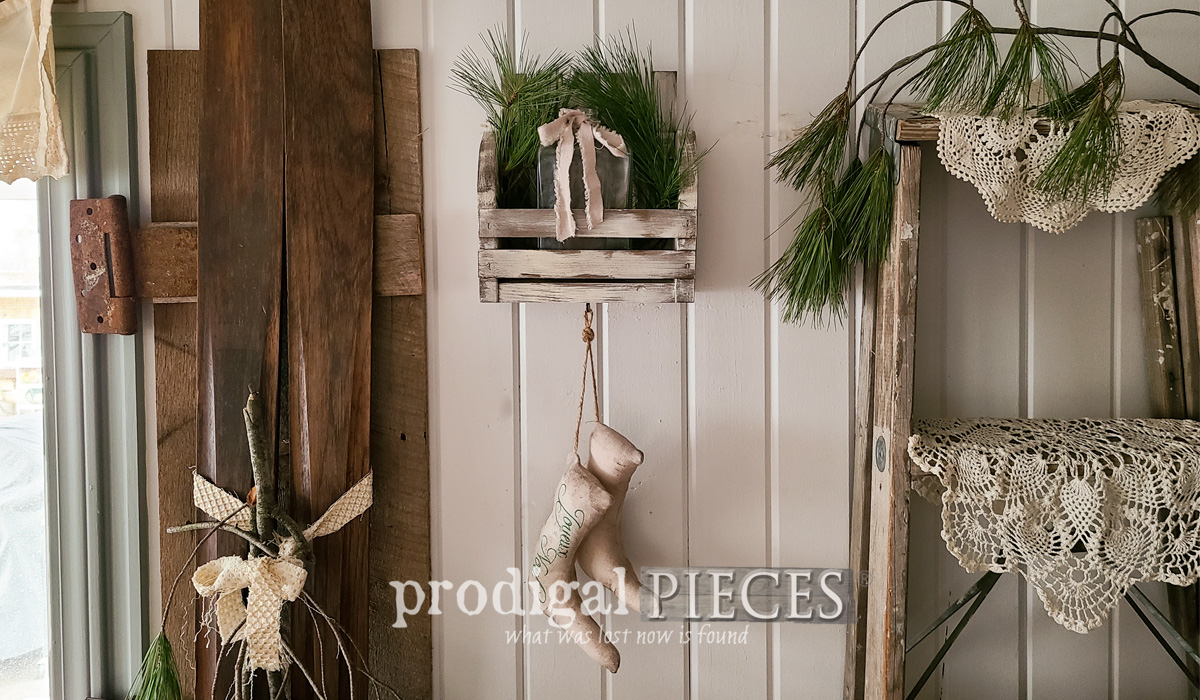
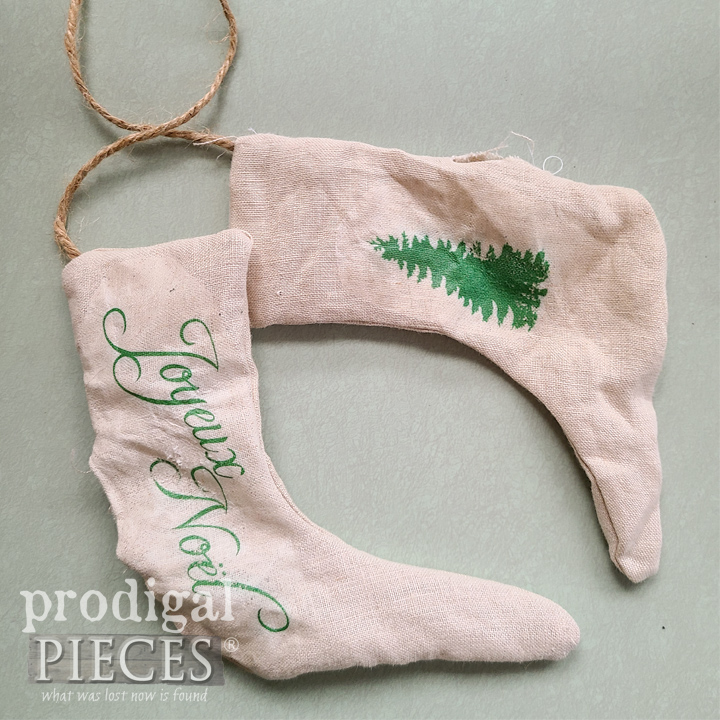
Last, but not least, feel free to add whimsy to your wall pocket. I chose to add an eye hook so I could hang a pair of rustic stockings I made from linen scraps and twine. You see the assembly process over HERE and find the free printable pattern HERE.
Step 10:
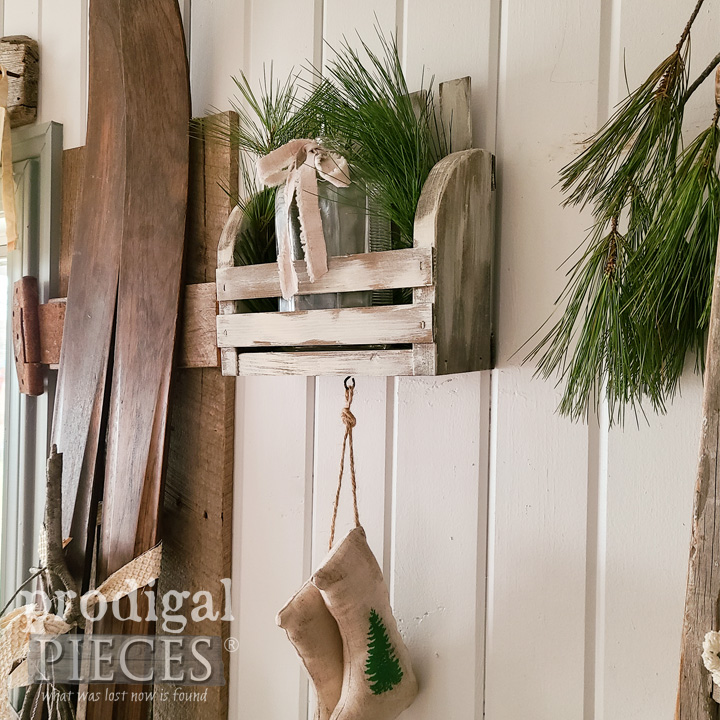
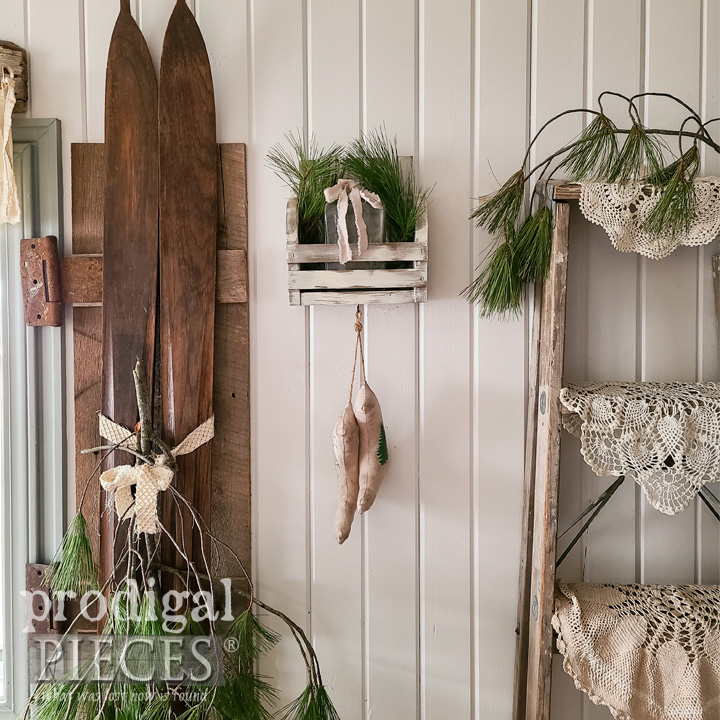
After our DIY fun, here is our DIY wall pocket complete and ready for the holidays. I’ve used some tree cuttings I found on the ground to stuff and tuck here and there. I’m definitely not one for box store décor. Bringing nature in is my favorite way to decorate.
Step 11:
Did you have fun? I so hope this project inspires you to tackle this project on your own. Feel free to ask any questions. Likewise, I invite you to come see my other DIY projects from furniture, to remodeling, sewing, and, crafting - my online shop at Prodigal Pieces. Until next time!
This sponsored post was created by Prodigal Pieces.
Download project steps & shopping list
We'll never share your email with anyone else.