The Do’s & Don’ts of Painting Cabinets
Amy Boyle from 11 Magnolia Lane Shows us her Project
How to Paint Kitchen Cabinets
Painting a kitchen full of cabinets is not hard, but it can be time-consuming. There are several important steps, including drying, that just takes time, so you can only rush the project so much. However, there are steps you can take that will save you time, energy and major headaches, so today I pulled my most important tips into a post for those of you undertaking this project.
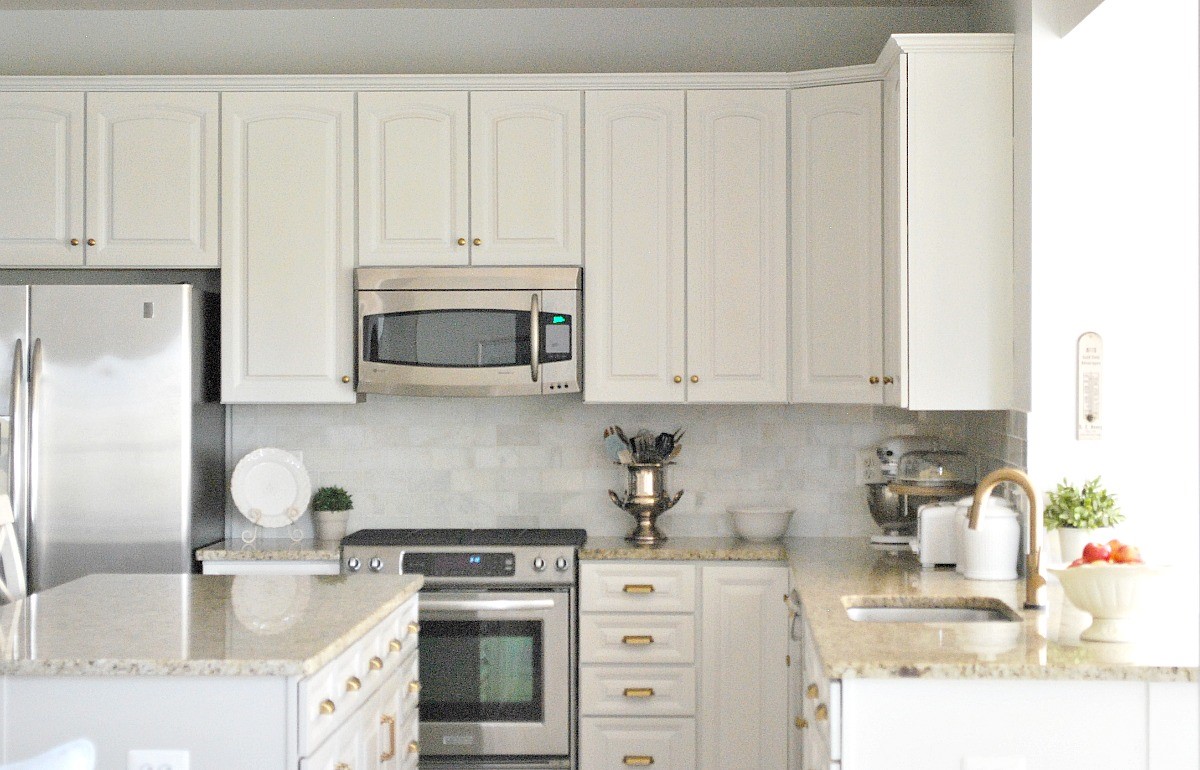
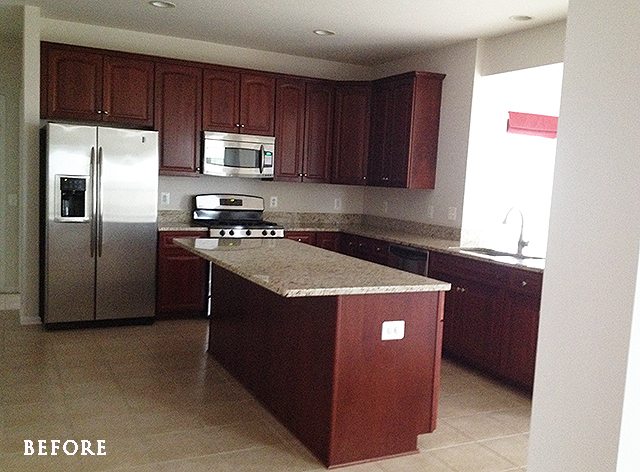
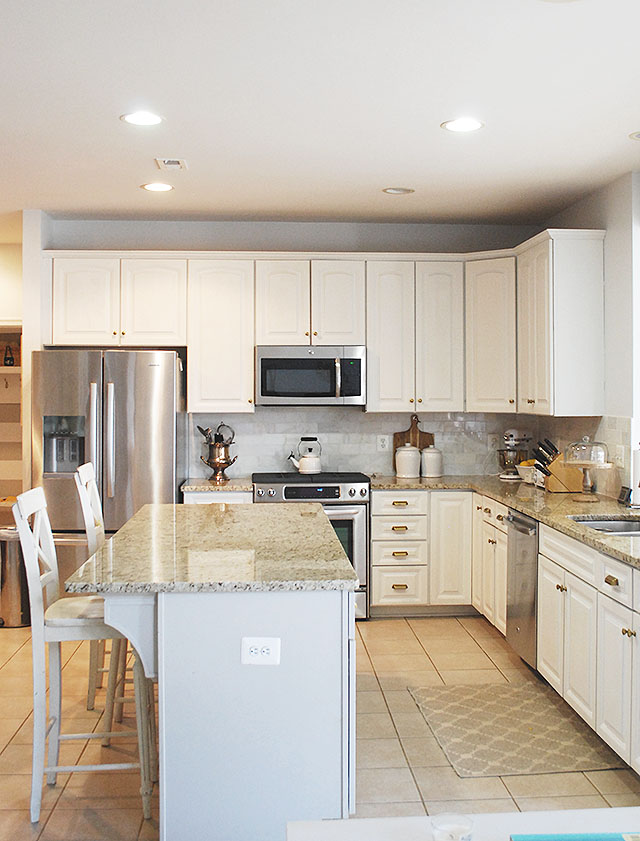
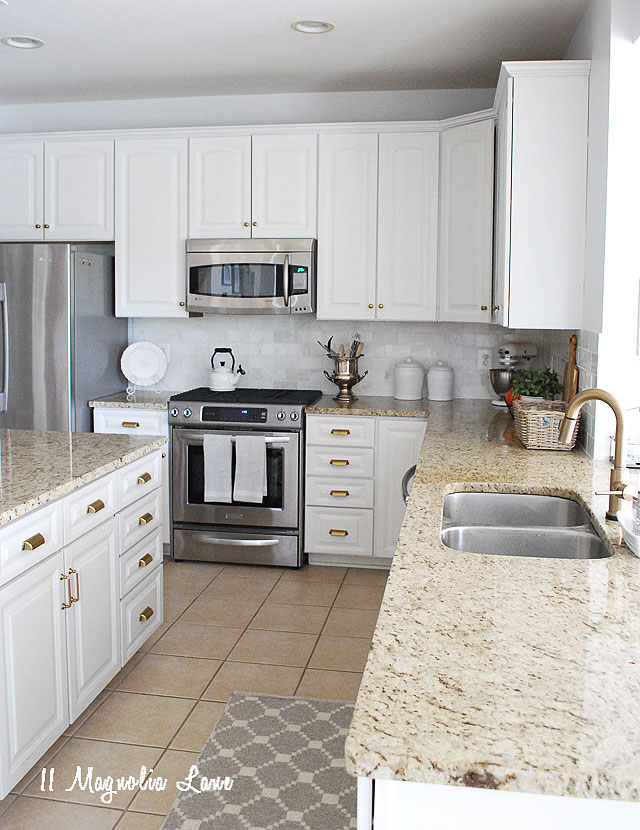
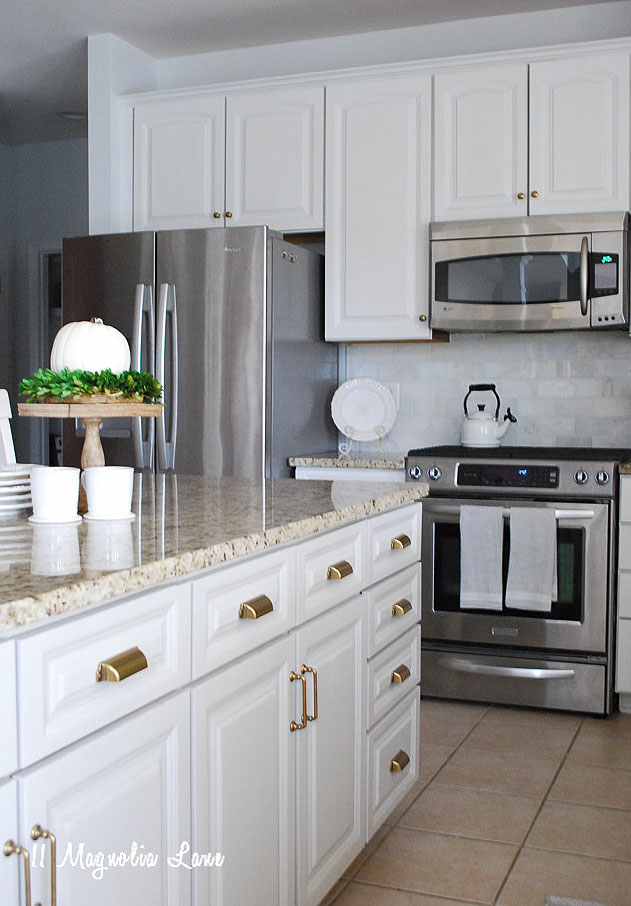
Facing a kitchen full of dated, wood cabinets can be intimidating. Below is a picture of our kitchen before I painted and made a few other updates in this space. I worked through my kitchen in sections, which helped make the project more manageable. Though I consider this to be a fairly large kitchen, so that also contributed to the scale of the project.
I have a post with the step by step process I used to paint our cabinets HERE. It covers all the tools you need, how I broke it down into sections and the important tools I used to do the job, so be sure to check that out. You can also see our full kitchen reveal post HERE.
Want a quick overview of the cabinet painting process? Check out this 1 minute video of the process using a paint sprayer below!
Last fall I wrote an update on how the finish was holding up on the cabinets, two years post-painting. I thought that was important because what everyone wonders is, will the paint last? Will it chip off? How will it hold up? I wanted to reassure everyone that I had barely any issues with two years of wear and tear by my kids, family and our dogs :) You can check that post out HERE.
So here are my Do's and Don'ts I think everyone should know about before they undertake painting their kitchen cabinets.

1--Just DO it! If your kitchen is aging, you really aren't going to hurt it by updating your cabinets. Sure, not everyone loves painted wood, but in the end, it is your home. Make it one you love!
2--Do set aside enough time, or know that this will go on for awhile especially if you can only paint nights and weekends. Though, the time it will take will depend on the size of your kitchen. Work in sections to minimize disruption unless you have a small kitchen.
3--DO USE A PAINT SPRAYER. Probably my most important piece of advice! I can't imagine tackling this project without one. Not only will a brush leave marks and streaks, it will take TEN times longer to complete. The HomeRight Super FinishMax is the perfect tool for this project, it is easy to use even for a beginner and will give you factory finish results. You also should use a Spray Shelter, this enabled me to leave my cabinet outside to dry overnight, kept the dust off and protected my garage from any overspray (watch the quick and easy set up video here).
4--Do prepare and sand obsessively well. It's not really the painting that is hard, it is the sanding. I removed as much of the existing stain and gloss top coat as I could, I think this really helped my paint finish be durable. I recommend using a palm sander along with a corner sander (especially if you have grooves in your cabinet fronts) to make this easy, again a piece of sandpaper is just not going to give you the best result.
5--Do use small painter's risers to raise up the cabinets while you paint. Even if the paint is dry, it won't be fully cured, so when you flip the cabinet over it may stick to the drop cloth. The risers will help reduce any contact marks and allow you to flip the cabinets sooner.
6--Do enlist help if you can. Again, this is a big job. Have a friend who also wants to paint cabinets? Help her (him) in exchange for them helping you. Or, hire out the sanding part--my teenage son was fabulous at this job and he worked cheap. Find a neighborhood teenager to tackle this for you and save your energy, or start painting the frames to save time during this step.
7--Do be fully prepared before you start. Stock up on your supplies. You can download our Painting Cabinets Checklist to make gathering everything you need easy. You should make sure to buy enough paint and primer (1 gallon of both was enough to do my kitchen), and plenty of sanding pads if you using power sanders. These pads wear down quickly and you'll want to switch to a new one often for the best results. Buy at least 2, and really 3 is better, packs of refills.
8--Do charge up your drill, it will make taking any hardware and the cabinet doors off much faster than a screwdriver.
9--Do sample paint first if you aren't sure of a color, you definitely want to be sure you love the results. Buy a sample can, or if you don't like what you see, stop and get another color. Just because a color looks good in someone else's kitchen, or online, doesn't mean it will work in your space.

1--Don't use bargain paint. This is the time for good paint, it is a little more expensive but you want the paint to last. Make the investment in the highest end paint your paint store recommends. I used Sherwin Williams Door formula, be sure to buy when it goes on sale!
2--Don't skip priming. Again, this isn't the project to use a paint mixed with primer to save a step. Buy a quality primer apply it using the sprayer for good coverage, sand any rough spots down, and let it dry well. 3--Don't rush the drying time. Hard as it is to be patient, make sure the paint is adequately dry before you flip the cabinets or reinstall them. The paint will be vulnerable for at least the first month, I chipped off several places when reinstalling the doors by accident. Nothing a quick touch up couldn't fix, but take extra care the first few weeks.
4--Don't skip making other updates. If you have exposed hinges, which will date the look of your kitchen, update those along with adding new hardware. You'll love your new look so much more!
5--Don't give up! Push through to the end and you'll love your result. The last section is the hardest section but once all the cabinets are finished you will be so glad you did it!
For tons more information on how to paint cabinets with the HomeRight Super FinishMax, please visit the HomeRight DIY website HERE.
Download project steps & shopping list
We'll never share your email with anyone else.